In the ever-evolving landscape of enterprise communication, the integration of robust VOIP solutions with Microsoft Teams has become paramount. The AudioCodes VOIP Gateway serves as a critical bridge, connecting the dots between traditional telephony and modern unified communications. This blog post delves into the nitty-gritty of configuring an AudioCodes VOIP Gateway to work seamlessly with the Teams SIP Gateway, ensuring a smooth and uninterrupted flow of voice data across your organization’s communication channels.
In this article, we’ll configure an AudioCodes MP-124 to connect to Teams’ SIP Gateway. While there is decent documentation available around this topic, there also are some variables and unspecified steps involved – hence why I wrote (and you found) this post!
Referencing Microsofts’ manual and prerequisites: Configure SIP Gateway – Microsoft Teams
Referencing AudioCodes installation guide: How to Configure the Microsoft SIP Gateway with AudioCodes Analog Telephone Adapters
Step 1 – Prepare your Network
It is utmost important your network is ready to provide the to-be-installed gateway the right connectivity. During the installation/configuration process, the gateway will need to download a specific configuration file. If internet connectivity is lacking, this will fail and in some cases you might need to re-do the whole config.
Therefore, make sure your network is configured correctly, as well as it accepts your AudioCodes Gateway (e.g. Network Access Control , (v)LAN configuration, etc.). Details are outlined by Microsoft but mainly consist of the following:
- Open your firewall to Microsoft 365 and Teams. Open your network’s firewall to Microsoft 365 and Teams traffic as described in Office 365 URLs and IP address ranges. Firewall rules are needed for outbound traffic only.
- Make sure the SIP devices are not behind a proxy. Ensure that http/s traffic bypasses any corporate http/s proxy.
- Open UDP ports in the range 49152 to 53247 for IP ranges 52.112.0.0/14 and 52.122.0.0/15.
- Open TCP port 5061 for IP ranges 52.112.0.0/14 and 52.122.0.0/15.
- Open the following IP addresses for HTTP and HTTPS:
- 13.75.175.145
- 52.189.219.201
- 51.124.34.164
- 13.74.250.91
- 13.83.55.36
- 23.96.103.40
Also configure your Conditional Access (if any) to accept/bypass requests from the following applicable (exclude or whitelist from conditional access):
North America:
- East US: 52.170.38.140
- West US: 40.112.144.212
EMEA region:
- North EU: 40.112.71.149
- West EU: 40.113.112.67
APAC region:
- Australia East: 20.92.120.71
- Australia Southeast: 13.73.115.90
If you are unsure if all is set correctly – consider configuring the gateway on a direct-internet connection and after confirming correct behavior, place it into the controlled network.
Step 2- Configure Microsoft Teams
In Teams – configuration is quite straight forward, and well documented in the same Docs article mentioned.
In short, you’ll want to do the following:
Configure Voice Policy to allow SIP Devices
By default, the function “SIP Devices can be used for calls” is “off”. So we need a policy which have this setting enabled. Either update an existing custom voice policy, or create a new one, making sure this setting is turned on.

This voice policy is to be connected to the accounts mentioned in B). If you don’t, the accounts won’t be able to be connected to the ports created in C) – but we start in reverse order, as usual.
Create “Common Area Phone” account(s) to be connected to the lines/phones
These accounts can be created as regular user or common area phone, make sure it is licensed correctly, has a phone number and phone system, obviously. Make sure to use the voice policy created or updated in step A. Nothing to do with those accounts now – but have them ready for later.
Ready the Port(s) to be connected/confirmed by ‘provisioning’ in SIP Devices tab
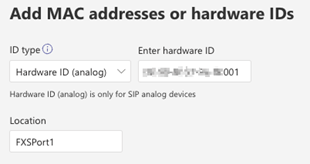
Here, you go to SIP Devices > + on the right-top corner > Provision Devices page. Now, click “Add MAC Addresses manually” and make sure to select “Hardware ID”. Now, add the MAC address of the AudioCodes Gateway, followed by a :, followed by the port number. For the first port on a MP124, this would be “00-xx-0x-0x-0x-xx:001” but of course with a correct MAC Address.
Now click on ‘generate verification code’. The code will be shown in the respective column as shown in the screenshot. Save this code -you’ll need this later. All ports can be pre-staged this way, at this moment.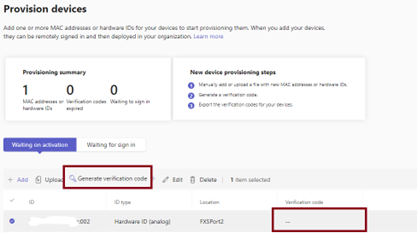
Step 3 – Configure the AudioCodes MP VOIP Gateway
This step is well-documented by AudioCodes themselves in their Installation Guide. However, I’d like to call out the steps involved in an easy way as well as some caveats here:
Set initial configuration
The first step involves logging in to the MP Web Interface, and configure the basics – IP Address, Subnet Mask, Gateway, DNS and NTP. I think those might not need additional clarification here, just be sure to use the advanced view in Settings -> VOIP > Network > IP.
NOTE – Make sure Internet Access is available. You might want to pre-stage or test this device in a guest or direct-internet network, when working in a high restricted network. This is so you can confirm the functionality of the AudioCodes and Teams configuration. It then becomes clear when moving the device into the secure network/definitive location, any issues popping up are due to network/security configuration.
Update Firmware
Second, the AudioCodes device probably needs to be updated. For most-used MP’s such as the MP-11x or MP-124, version 6.60A.367.001 and upwards is required. Version 6.60A.367.005 is the current version (at time of writing) and also the Microsoft-approved version.
Those are now freely available here (opposed to those familiar with SBC firmware which is/was only available on request) and is as easy as uploading the CMP file in the Maintenance Tab / Software Update menu.
Set Teams Configuration
Make sure the device is fully reset / no config – if not already done so (be aware of step A). If you re-purpose an existing, updated MP – you might want to upload an empty ini file in the configuration and/or reset by using the reset pin on the front side. However this requires you to do Step A again, of course.
Now for the fun part. This step involves adding a few parameters in the AdminPage. Just add “/AdminPage” to your URL (so http://<IP address>/AdminPage) and you’ll gain access to a level-deeper configuration of the AudioCodes.
Go to the ‘INI Parameters’ tab on the left side, and now enter a few parameters and values:
| Parameter | Value |
| AUPDResetURLOnWebConfig | 1 |
| Setdefaultoninifileprocess | 1 |
| inifileurl | Choose regarding your location: EMEA http://emea.ipp.sdg.teams.microsoft.com/mac.ini Americas http://noam.ipp.sdg.teams.microsoft.com/mac.ini APAC http://apac.ipp.sdg.teams.microsoft.com/mac.ini |
NOTE – use the URL in IniFileUrl exactly as written here! No need to change /mac.ini to the actual MAC address of the device.
After applying the IniFileURL, your device will likely reboot. This is expected, and now will download the configuration!!
Validation
Now you can validate the configuration has been done successfully.
First, you can check the value of ‘IniFileurl’ on the same AdminPage as in step C. Now, enter ‘IniFileUrl’ as parameter, but keep value EMPTY. Press on apply and you should see the current value in the output window.
Here, you will see it has altered into a longer URL, including the specific MAC address of your AudioCodes MP. Sweet!!!
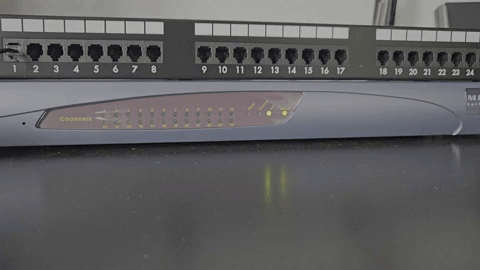
Configuration wise, you can check the Call Routing Status ( ID 1 and 2 will show Teams URL’s and status “OK”) and Registration Status ( all available ports should show “REGISTERED”). Those can be checked at Status & Diagnostics > VOIP Status.
Last but not least, configuration wise you might notice under Configuration > Control Network > Proxy Sets Table (1 and 2), as also “GW and IP to IP” > Routing > Tel to IP routing and IP to Hunt Group Routing. Those show now some values you did not enter manually 😊
Second, you can see specific configuration and status on the device. Physically, in my case on the MP124, you’ll see some green lights, but also port 19 to 24 are blinking. This is due to those are disconnected. Using SRTP, the MP124 only supports up to 17 channels.
Step 4 – Activate, connect account and test
Almost done! Now it’s time to connect the dots.
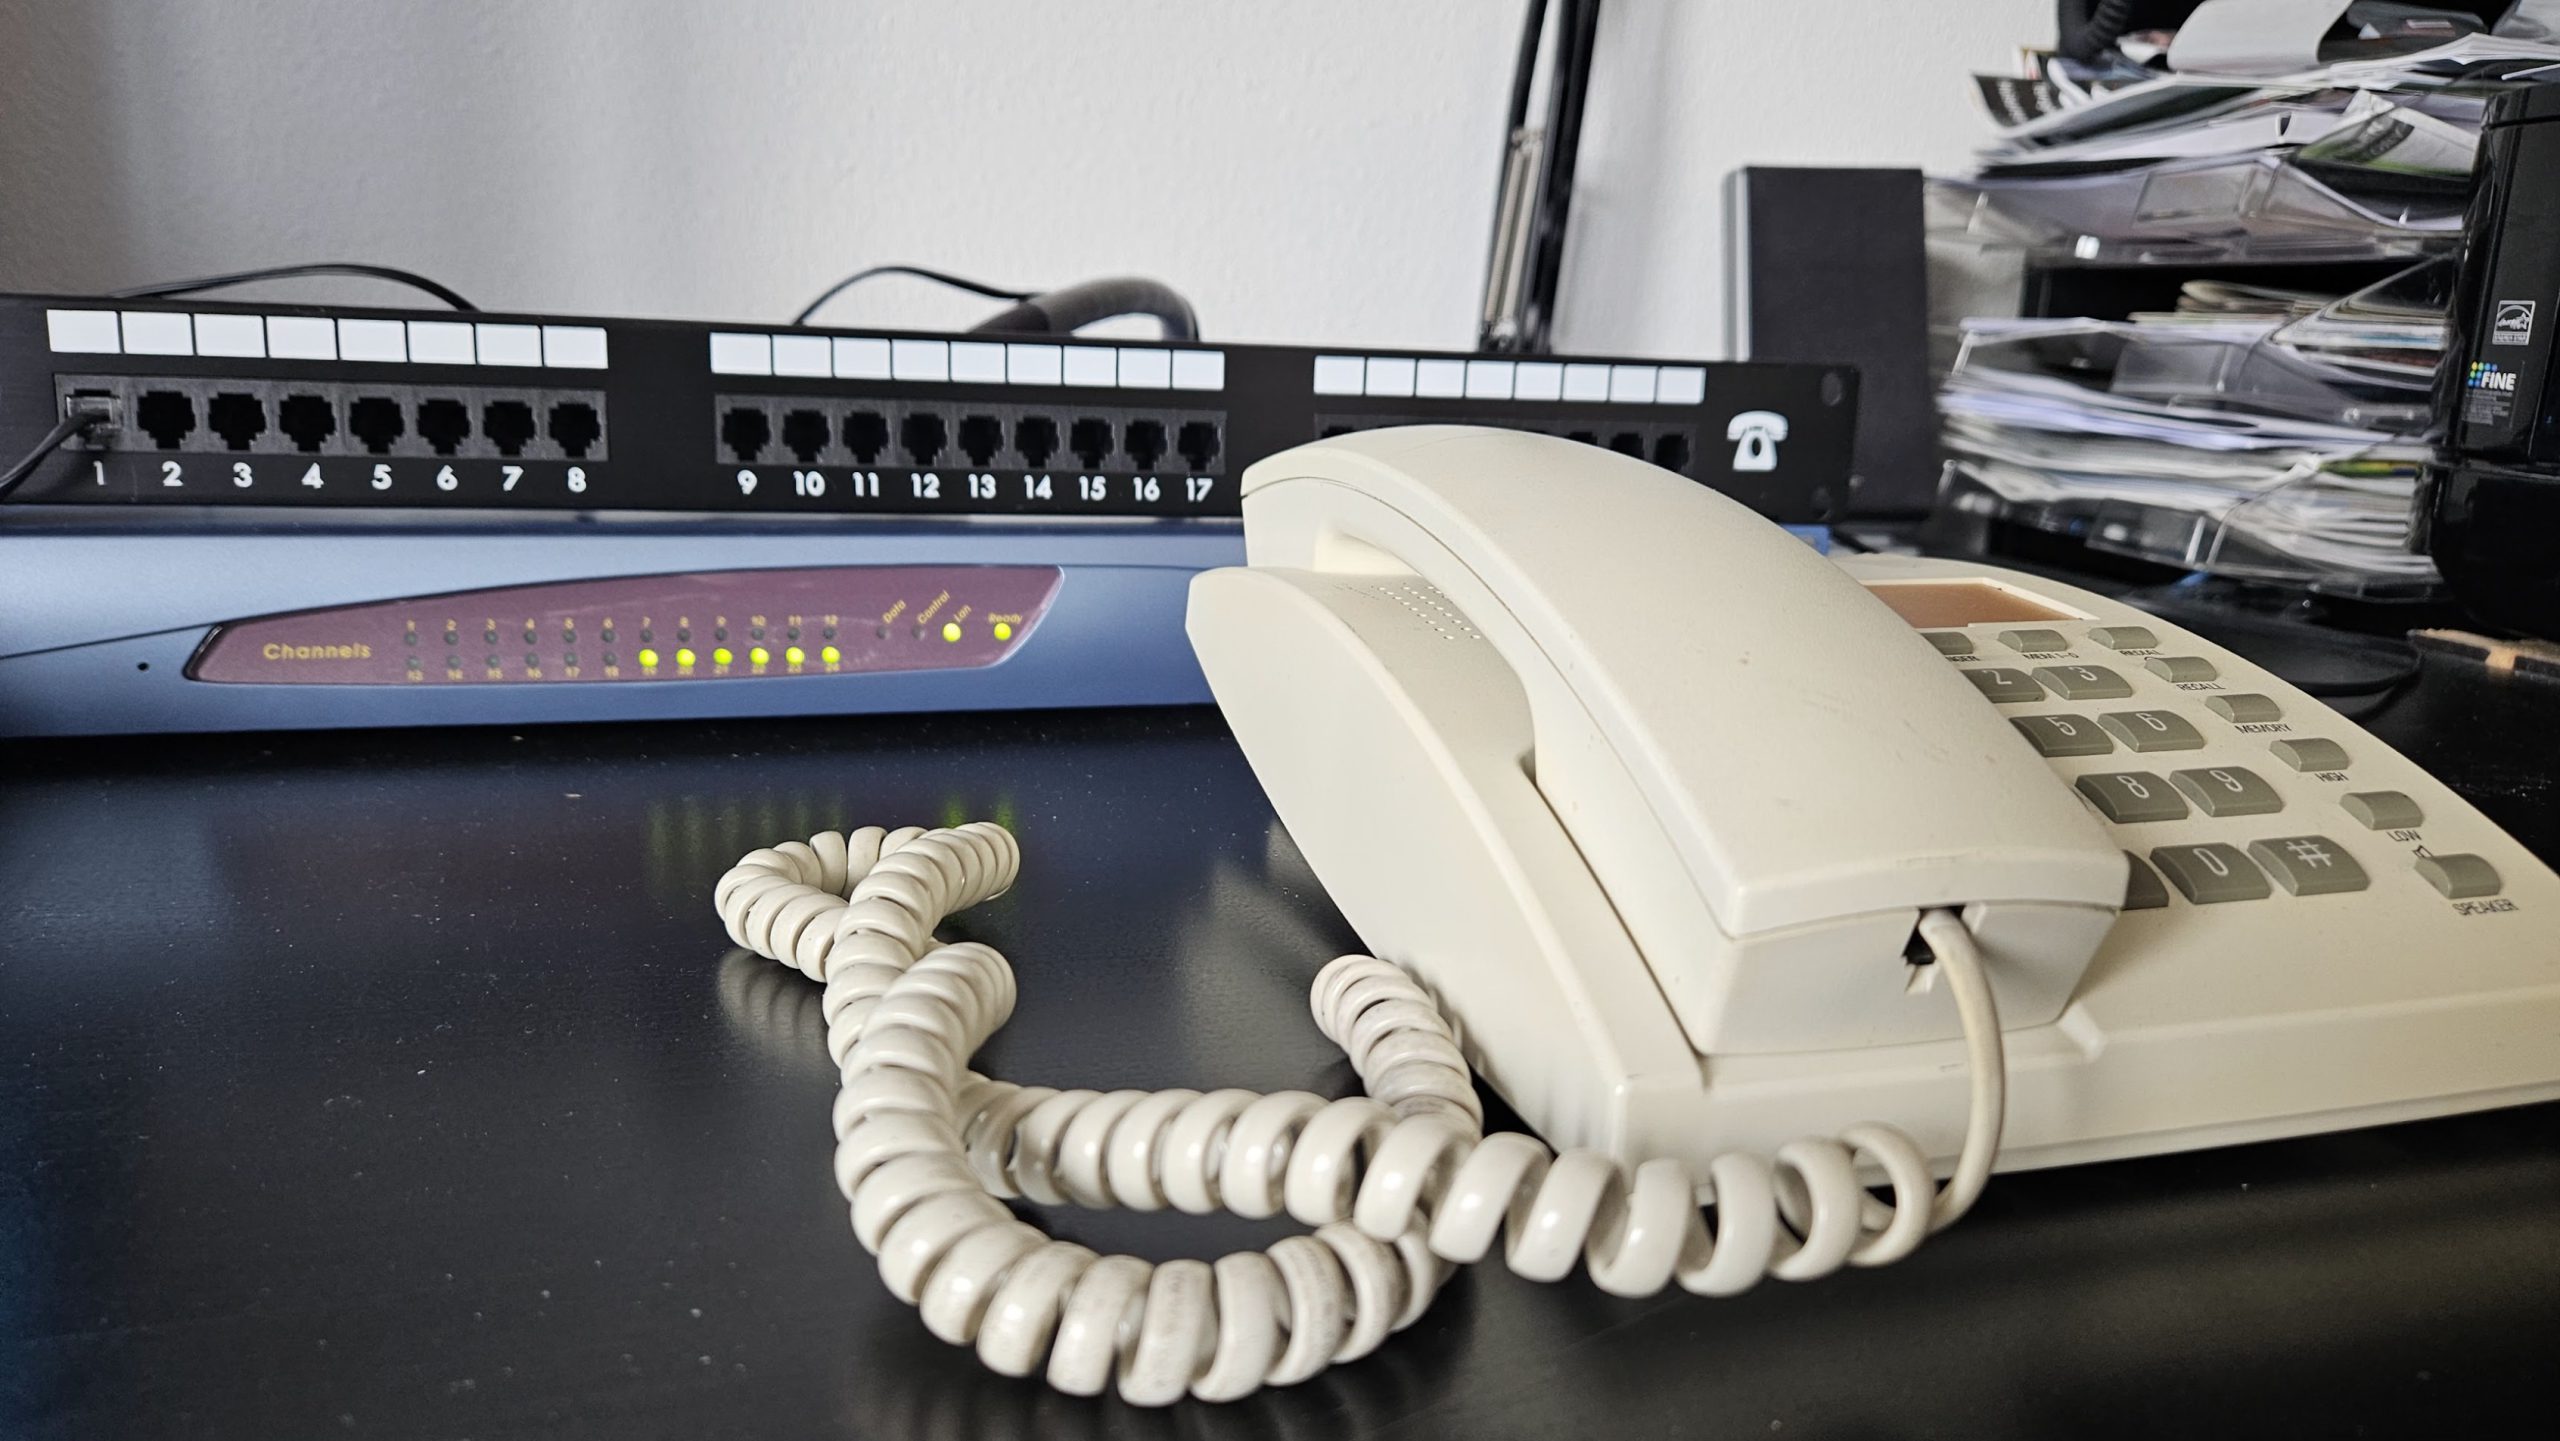
Activate the port/phone
Plug in a phone on the (configured) port of the AudioCodes MP. When you pick up the horn, you should hear a tone. This is good! Now, quickly dial *55*<activation code>. This could take a few seconds, eventually you’ll hear a teams ringtone. This means you’re all set!
NOTE: if you hear a busy tone – you failed! This indicates there is some issue with your configuration, or networking. This is where I advise to reset the device and re-do step 3, using an open internet connection.

Additionally, you might want to collect logs using the Status & Diagnostics page of the AudioCodes > message Log. This could have some valuable information, but in case of several network connectivity issues, you’ll just see ‘no route’ – like errors, while all may seem OK and correct in Step 3.
Connect the account to the port/phone in Teams Admin Center
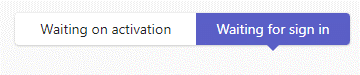
In Teams Admin Center, on the provision page you’ve used for Step 2, the phone should have moved from “Waiting on activation” to “Waiting for Sign In”.
Here now you can click on “sign in” and use the prompt/instructions to sign in the account, also created in Step 2. This process should be straight-forward. It should result in a signed in user:
Make test calls
Now you’re all set! The phone should show as “Healthy” under SIP Devices in Teams, you have all green lights on the AudioCodes, and for the last tests – we should be able to call now.
So pick up that phone, dial a number and enjoy calling using the SIP Gateway!