Come across those Polycom VVX phones, and find it hard to just upgrade its firmware? You’re not alone.
Don’t want to spend ages to read all documents and set up a provisioning server just for one silly update? Again, you’re not alone! This post is just a guide to update your Polycom device in an easy way.
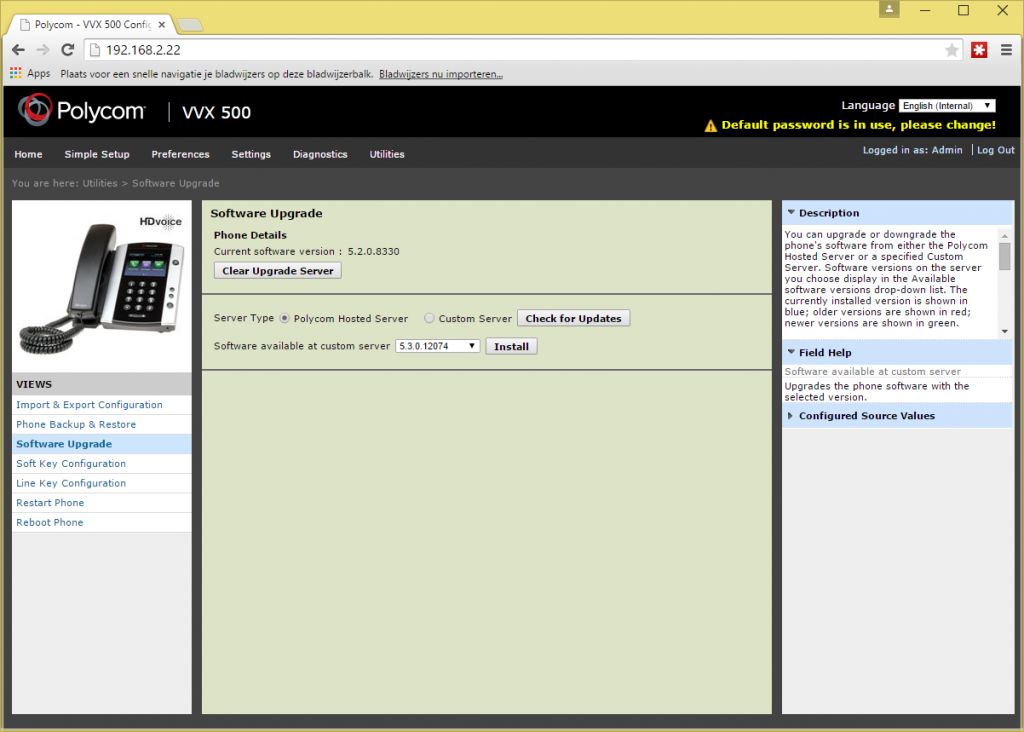
Usually, when you’d like to upgrade a single (or several multiple) Polycom VVX phone, you could just use the web interface to update if don’t want the hassle of a local “provisioning server”.
The phone then should immediately reboot and download/install the firmware. However, with some phones and/or some updates, this simply won’t work. As with this 5.3.0.12074 on a VVX500 for example.
The answer is fairly simple: create a local provisioning server! And this time, just for the update. It’s done in under 5 minutes.
Just take the following 8 steps:
- Download the “splitted” firmware file (with several *.ld files) from Polycom and unpack it to a directory, e.g. D:\FTP. For the 5.3.0.12074 release, use this link.
- Download a FTP server, in this guide we use FileZilla FTP Server.
- Install the FTP Server with all defaults.
- create an exclusion in your Windows Firewall. Just allow the FTP Server programme and not just port 21.
 Alternatively, disable your computer”s firewall for just during this process if you’re brave enough.
 - Start up FileZilla Server and configure:
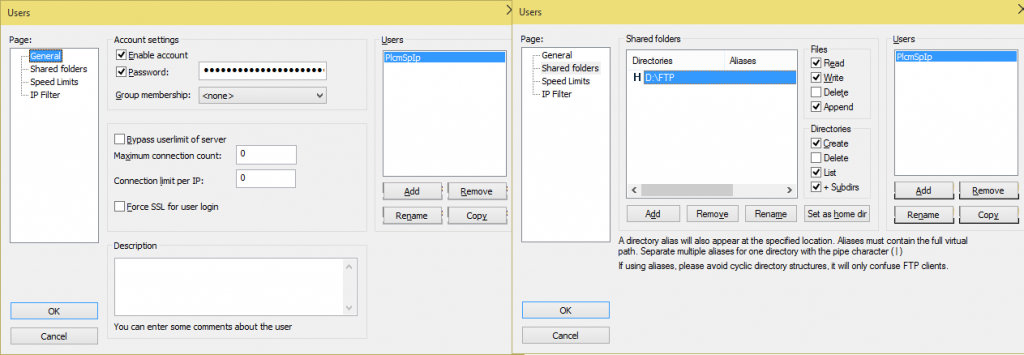
- at “edit > users > general”, create a new user with name PlcmSpIp and password PlcmSpIp (or create any whatever you like)
- at “shared folders’, add the folder where you unzipped the files, in our example D:\FTP and make it the home directory of the just created user. Make sure the user also has read, write and append rights. Click OK to apply.

- Create a new file, UCS.xml, in this FTP / update folder alongside the downloaded files. Give it the following code. Be sure to replace the firmware version and connection url (consisting of ftp:// + username:password@IP Address of server) if they are different to this example;
<?xml version="1.0" encoding="utf-8" standalone="yes"?> <PHONE_IMAGES> <REVISION ID=""> <PHONE_IMAGE> <VERSION>5.3.0.12074</VERSION> <PATH>ftp://PlcmSpIp:PlcmSpIp@10.0.0.2</PATH> </PHONE_IMAGE> </REVISION> </PHONE_IMAGES> - All Set! Now, go to that web interface of your phone again, and to the “softwareupgrade” page. This time, select “custom server” and enter the FTP path again, but add /UCS.xml to the FTP connection URL:

- Click “check for updates”. If all correct, you should now see the new firmware number displayed. One more click on “install” and your phone should start the update as it should! You can now also monitor the FileZilla FTP Server’s log for connections.


This was really helpful. However, in addition to the FTP server path, you need to include the ucs.xml file name. For example, ftp://x:x@10.0.1.232/ucs.xml
Thank you for the detailed, and simple instructions. I was able to upgrade my VVX500. It still wouldn’t reboot from the web menu but I rebooted it manually after manually adding the provisioning server from the phone menu.